AI · Tutorial
How to Train a LoRA on Replicate and Use It for Personalised AI-Generated Images
AI-generated profile pictures are a great way to create unique, high-quality images for LinkedIn and social media. This tutorial will walk you through training a LoRA (Low-Rank Adaptation) model on Replicate and using it with a LoRA-compatible model from Hugging Face to generate custom images of yourself.
Quick Note - This isn’t free, but it’s cheap. So far I’ve made over 30 images and it’s cost me less than £3 with the training data costs. It will take you about an hour to go through the whole thing (including waiting for the training to complete). With that out the way, let’s begin!
Step 1: Create a Model on Hugging Face and Get Your API Key
Before training your LoRA, you need to set up a model repository on Hugging Face where your trained weights will be stored.
1. Sign up at Hugging Face and create an account.
2. Go to the Model Hub and click “New Model”.
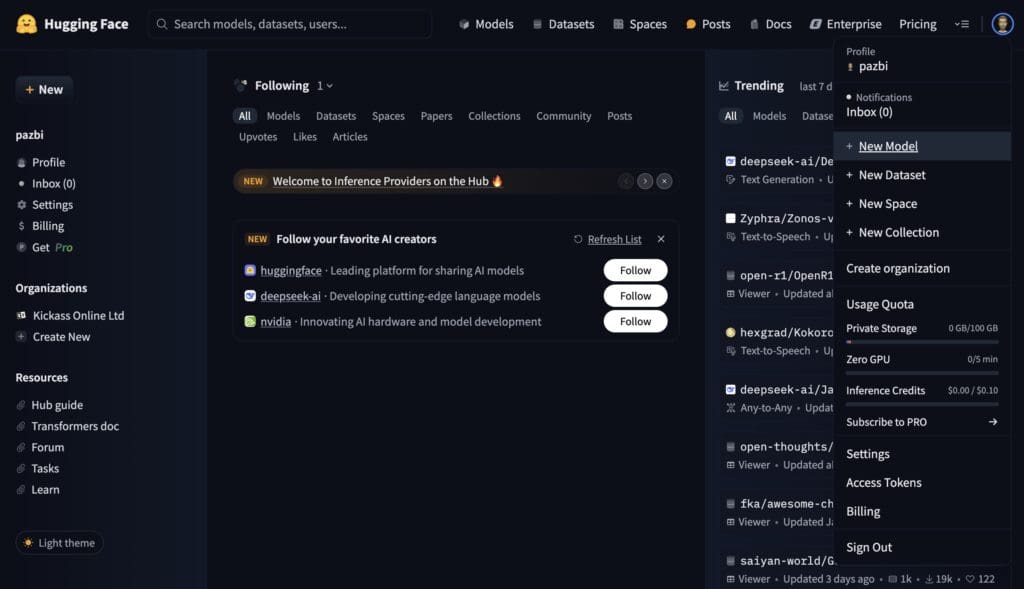
New Model menu
3. Name your model (e.g., yourname-lora) and set it to public or private. (Private is good but sometimes it can cause access issues, so start Private and if needed change to public temporarily)
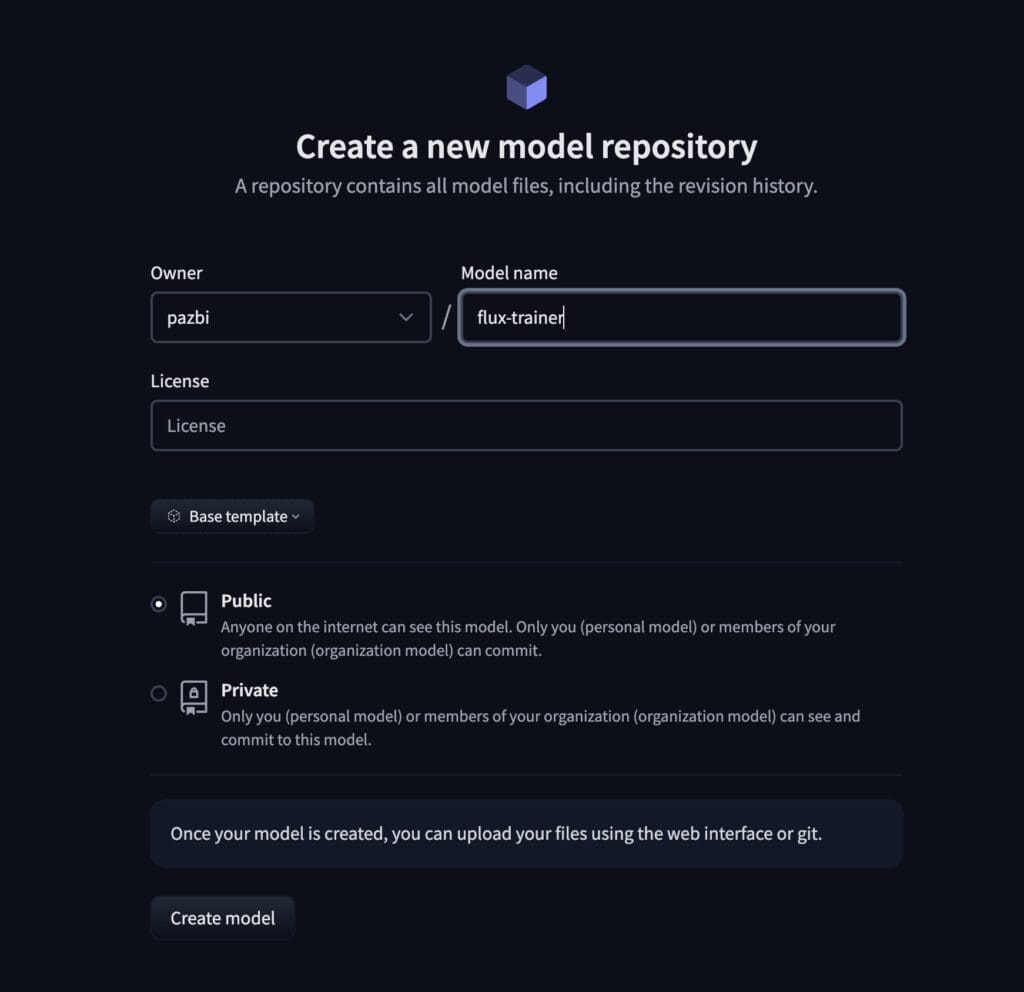
Create new model window
4. Go to Settings > Access Tokens and create a new API token with write access.
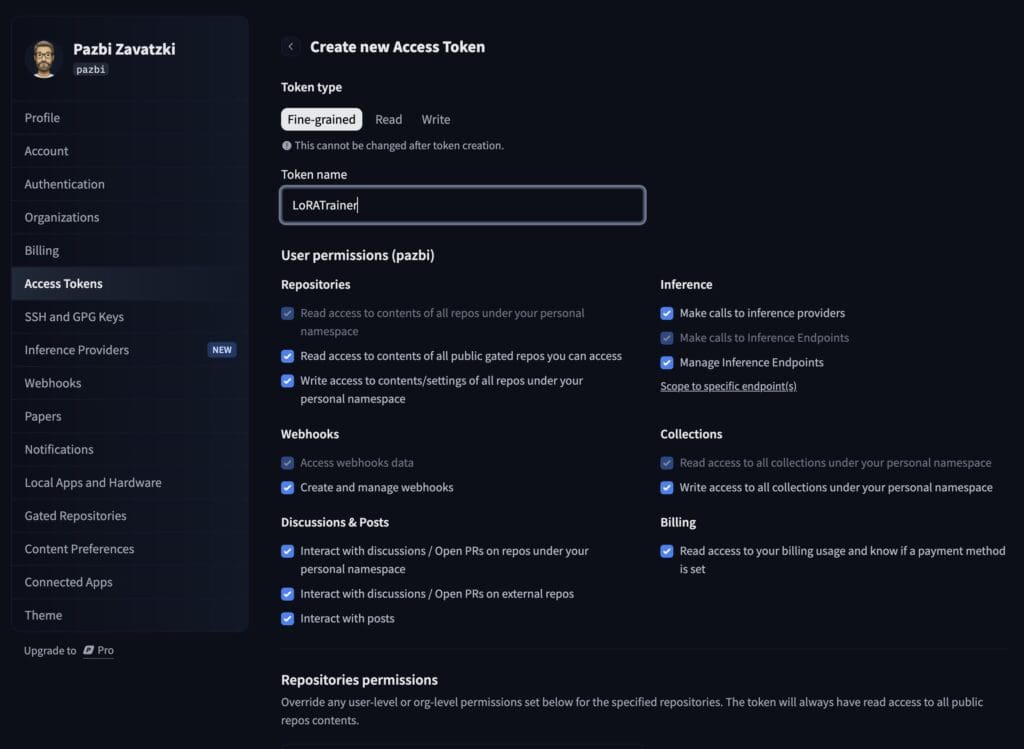
API Key Creation Window
5. Copy down your Access Key - IT WILL NEVER BE SHOWN AGAIN
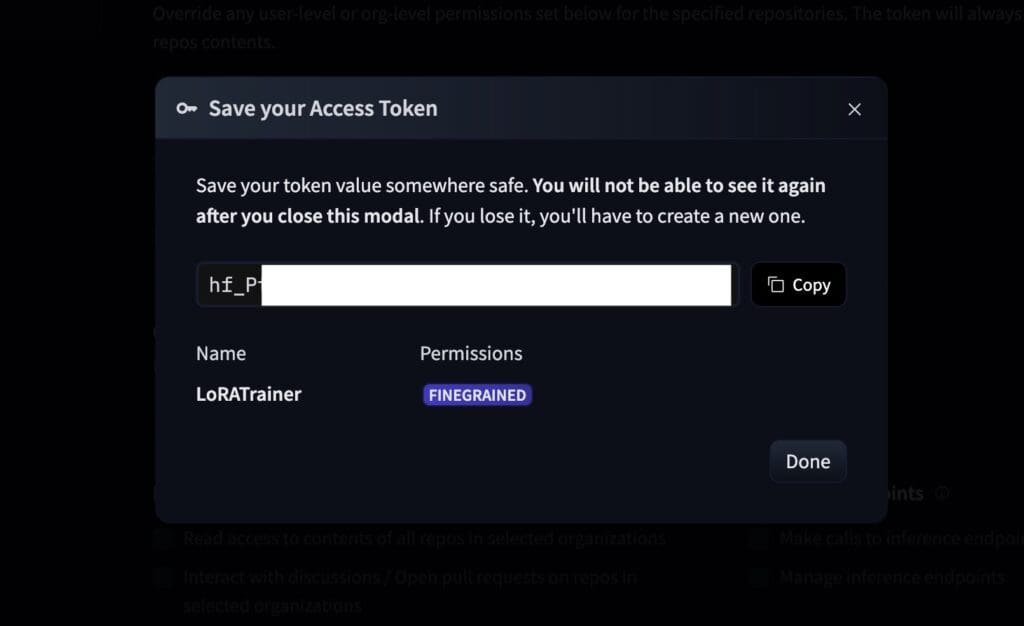
Final chance to get your access key!
If you forget to do this, or lose it before the next steps then you will need to redo step 4.
Step 2: Collect and Prepare Your Training Images
To train a LoRA model effectively, you need a dataset of high-quality images of yourself. Follow these guidelines for the best results:
• Use 10–20 images showing different angles, expressions, and lighting conditions.
• Avoid blurry, low-resolution, or heavily filtered photos.
• Crop images so that your face is prominent in each one.
• Once you’ve selected your best photos turn them into a .zip folder.
💡 Tip: Vary your dataset. The more variation, the better the model generalises.
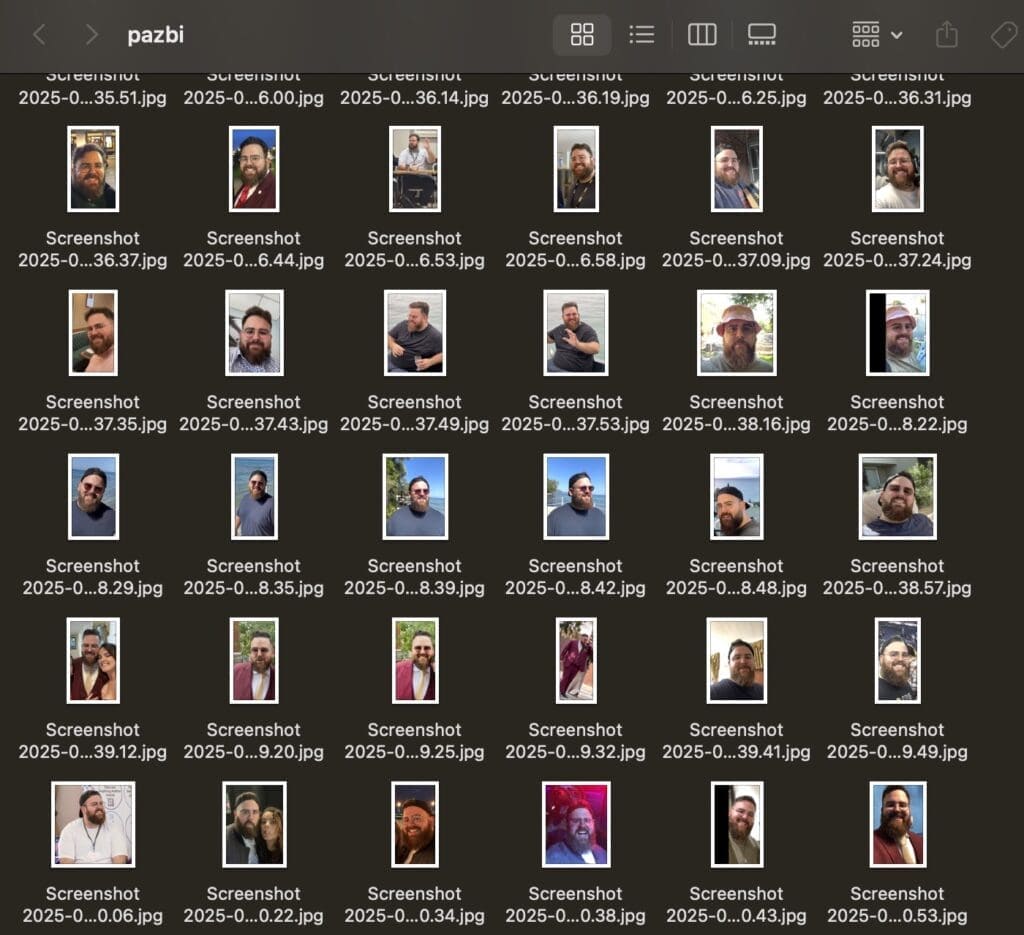
Folder with potential training images
Step 3: Train Your LoRA on Replicate
Now that you have a Hugging Face model set up, you can train your LoRA model on Replicate.
1. Sign up at Replicate and go to the LoRA trainer.
2. Find a LoRA training model, such as sdxl-lora-trainer or flux-dev-lora-trainer
3. Configure training settings
• Destination model: Create a new one for this training and name it something relevant - again Public / Private depends on your preference
• Input Images: Upload your zip file with your images here.
• Choose your trigger word e.g YOURNAME (this will tell the Generative model to use the training data you’ve created)
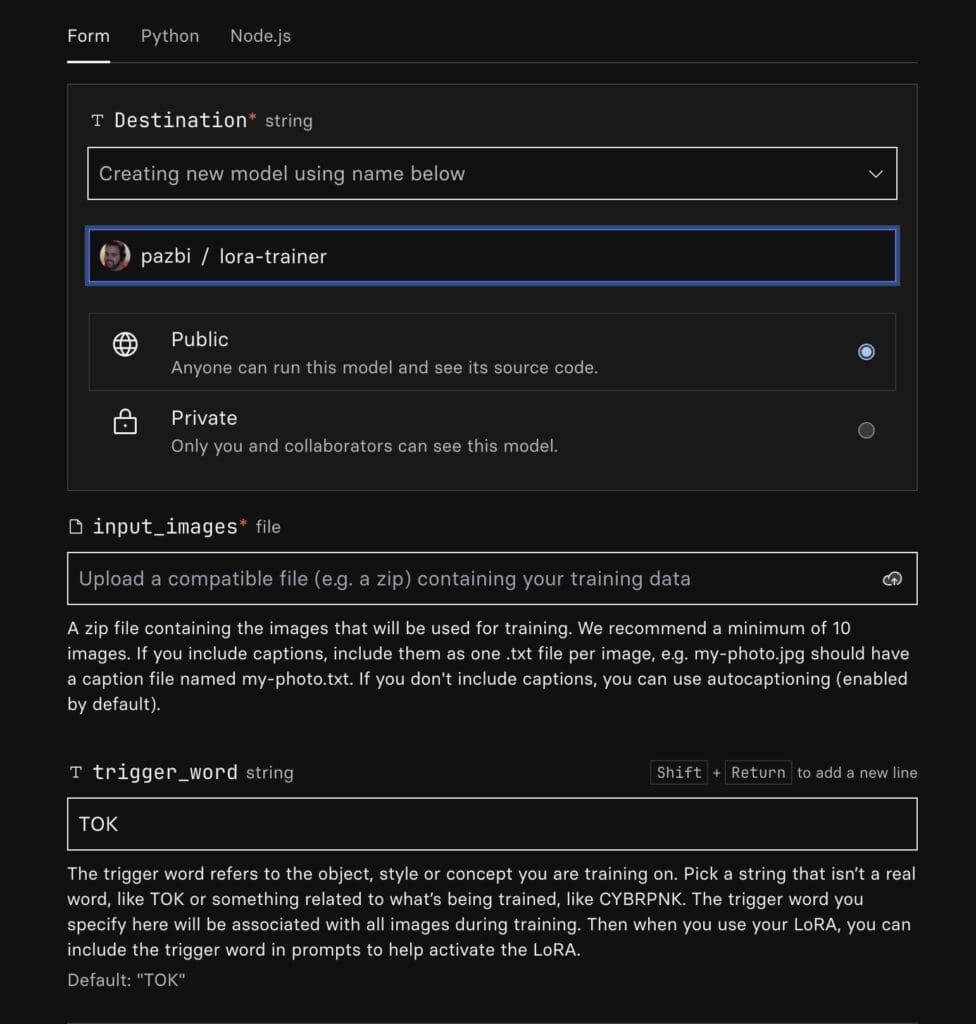
Training model form
4. Connect your Hugging Face account:
• Training steps: Start with 500–2000 steps.
• Lora rank: Stick with default values unless you want to experiment.
• Paste your Hugging Face API key into Replicate when prompted.
• Select the Hugging Face model you created earlier as the output destination.
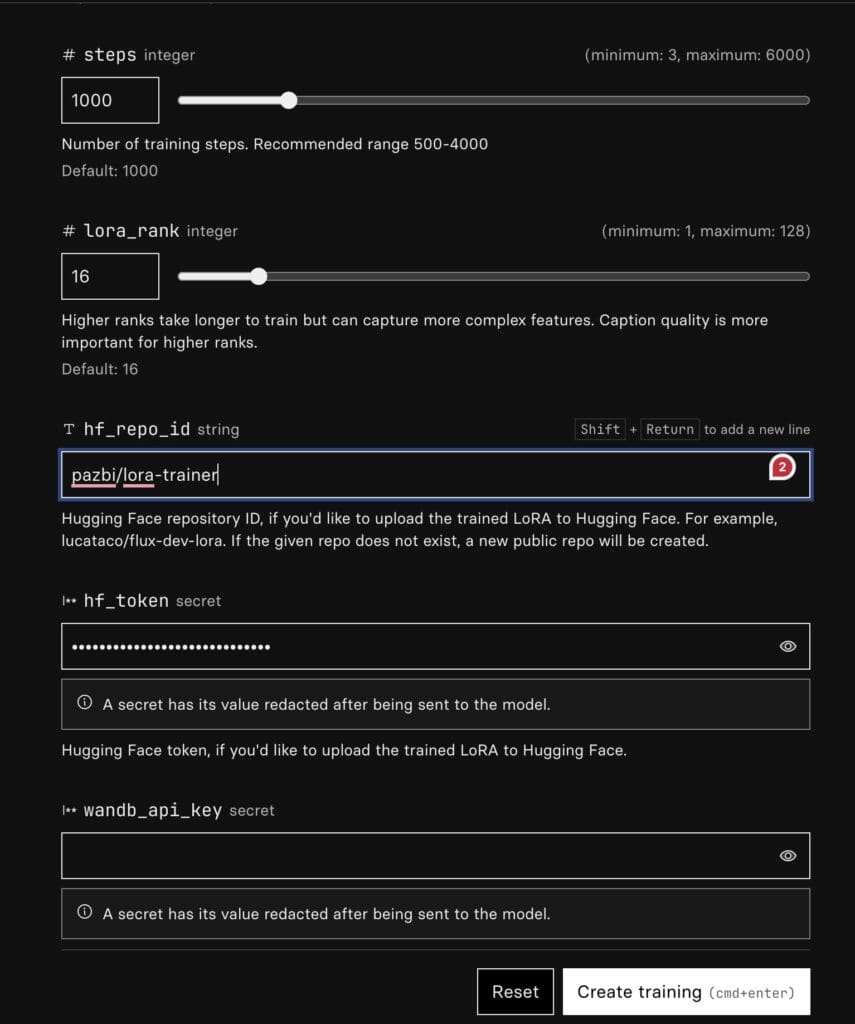
5. Start the training process and wait for it to finish - it can take around 20 - 30 minutes. Put a cuppa on. Hopefully you will get this when done.
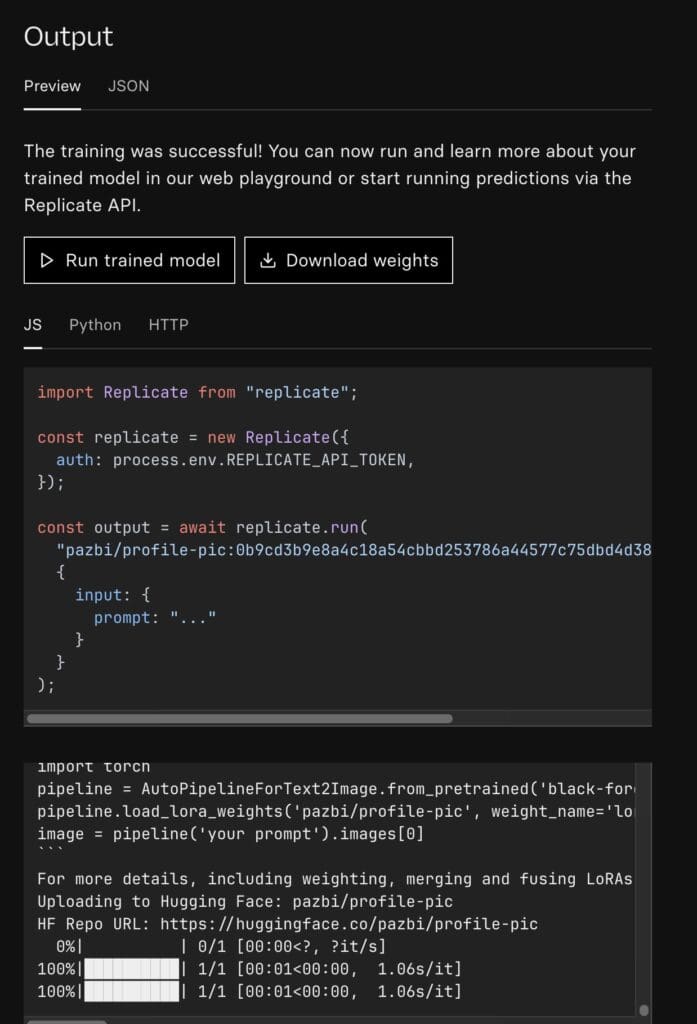
Screenshot
Step 4a: Load Your Trained LoRA into a Hugging Face Model (EASY MODE IN STEP 4B)
Once your LoRA model is trained, it is automatically stored in the Hugging Face model repository you created earlier. Now, you can load it into a LoRA-compatible model for image generation.
1. Open a Google Colab notebook or use a local setup with diffusers.
2. Install the required libraries:
pip install diffusers transformers accelerate torch3. Load the base model and attach your LoRA:
from diffusers import StableDiffusionPipeline
import torch
model_id = "stabilityai/stable-diffusion-xl-base-1.0"  # Base model
lora_path = "your-huggingface-username/yourname-lora"  # Your trained LoRA
pipe = StableDiffusionPipeline.from_pretrained(model_id, torch_dtype=torch.float16)
pipe.load_lora_weights(lora_path)
pipe.to("cuda")  # Use GPU if available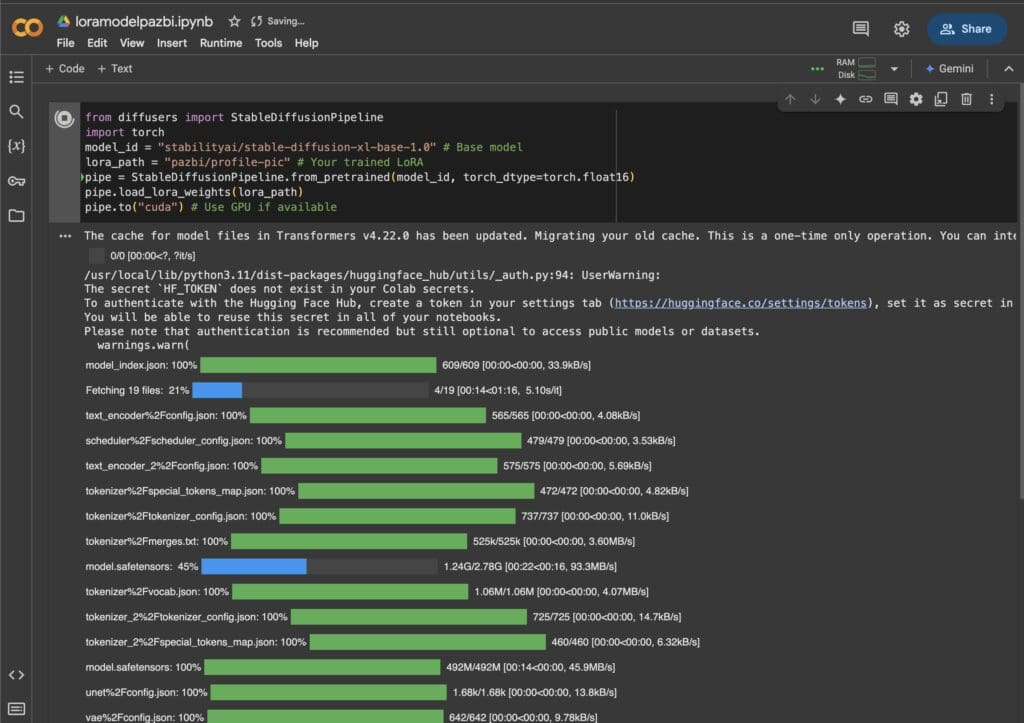
Screenshot
4. Generate an image:
prompt = "KEYWORD Professional headshot of a confident podcaster, realistic lighting, studio quality"
image = pipe(prompt).images[0]
image.show()
Step 4b: Generate Images Using Flux-Dev-LoRA on Replicate
Instead of using Hugging Face locally, you can generate images directly using Flux-Dev-LoRA on Replicate. This is a little less daunting for my no code friends.
Steps to Generate an Image
1. Go to Flux-Dev-LoRA on Replicate.
2. Click “Run” and customise the following parameters:
• Prompt: Describe your desired image, e.g.,
“KEYWORD Professional headshot of a confident entrepreneur, realistic lighting, studio quality”
• LoRA Model: Enter the URL of your trained LoRA model on Hugging Face.

Screenshot
• Style and Settings: Adjust CFG scale, image resolution, and seed if needed.
3. Click “Submit” and wait for the AI to generate an image.
4. Once the image is ready, download it and review the results.
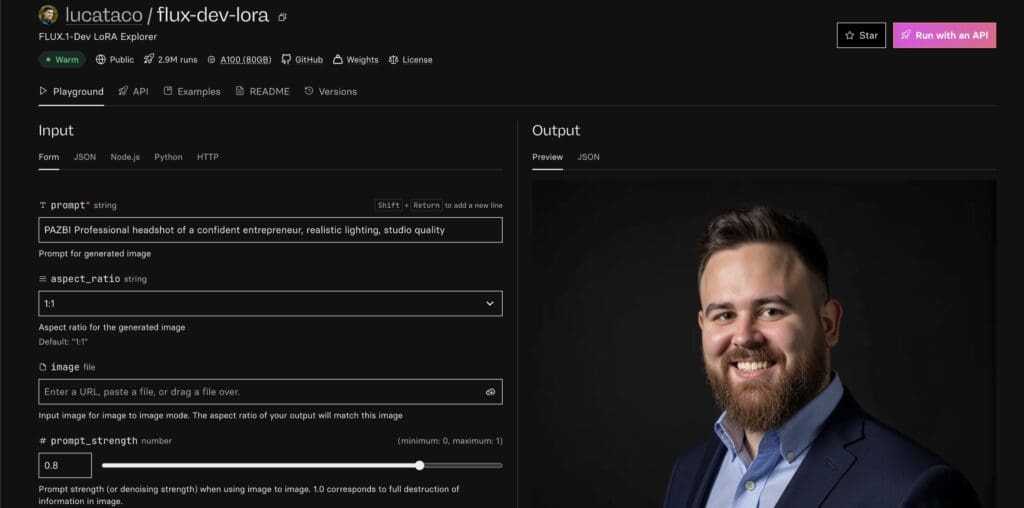
Screenshot
Step 5: Save and Use Your AI-Generated Images
Now that your images are generated, you can save and edit them for social media.
• Save your favourite images and upscale them if needed.
• Use tools like Photoshop or Canva to adjust brightness, contrast, or background.
• Upload your AI-generated headshots to LinkedIn, Twitter, or other platforms.

Final Thoughts
By training a LoRA on Replicate and hosting it on Hugging Face, you get full control over AI-generated images for personal branding and marketing.
Give it a try and share your AI-generated headshots with me.
If you like this and want to learn more DM me “LoRA” on Linkedin.
Also for you who made it all the way through. Here is my favourite blooper.